UnifiedPush Server
  • Documentation
  • GitHub
  • Help

›Configuring Variants

Introduction

  • Overview
  • Useful Terminology
  • Push Notifications
  • How the UnifiedPush Server works
  • Use-cases and scenarios

Running Unified Push

  • Running Unified Push
  • JMS Broker Configuration

Configuring Variants

  • Getting Started
  • Android Variant
  • iOS Variant
  • WebPush Variant

Configuring Clients

  • Android Client
  • iOS Client
  • Webpush Client
  • React Native Client
  • Cordova Client

Unified Push Server SDK

  • Java Sender API
  • Node Sender API
  • RESTful Sender API

Maintaining Unified Push

  • Maintaining Unified Push

WebPush Variant

The following step-by-step guide gives you an introduction on how to use the AeroGear UnifiedPush Server for sending Web Push Notifications to your web application.

Create WebPush Variants

Before you can create a WebPush Variant with the UnifiedPush Server you need to get your VAPID Keys (see The Web Push Protocol for details). You can use, for example, this site to generate them.

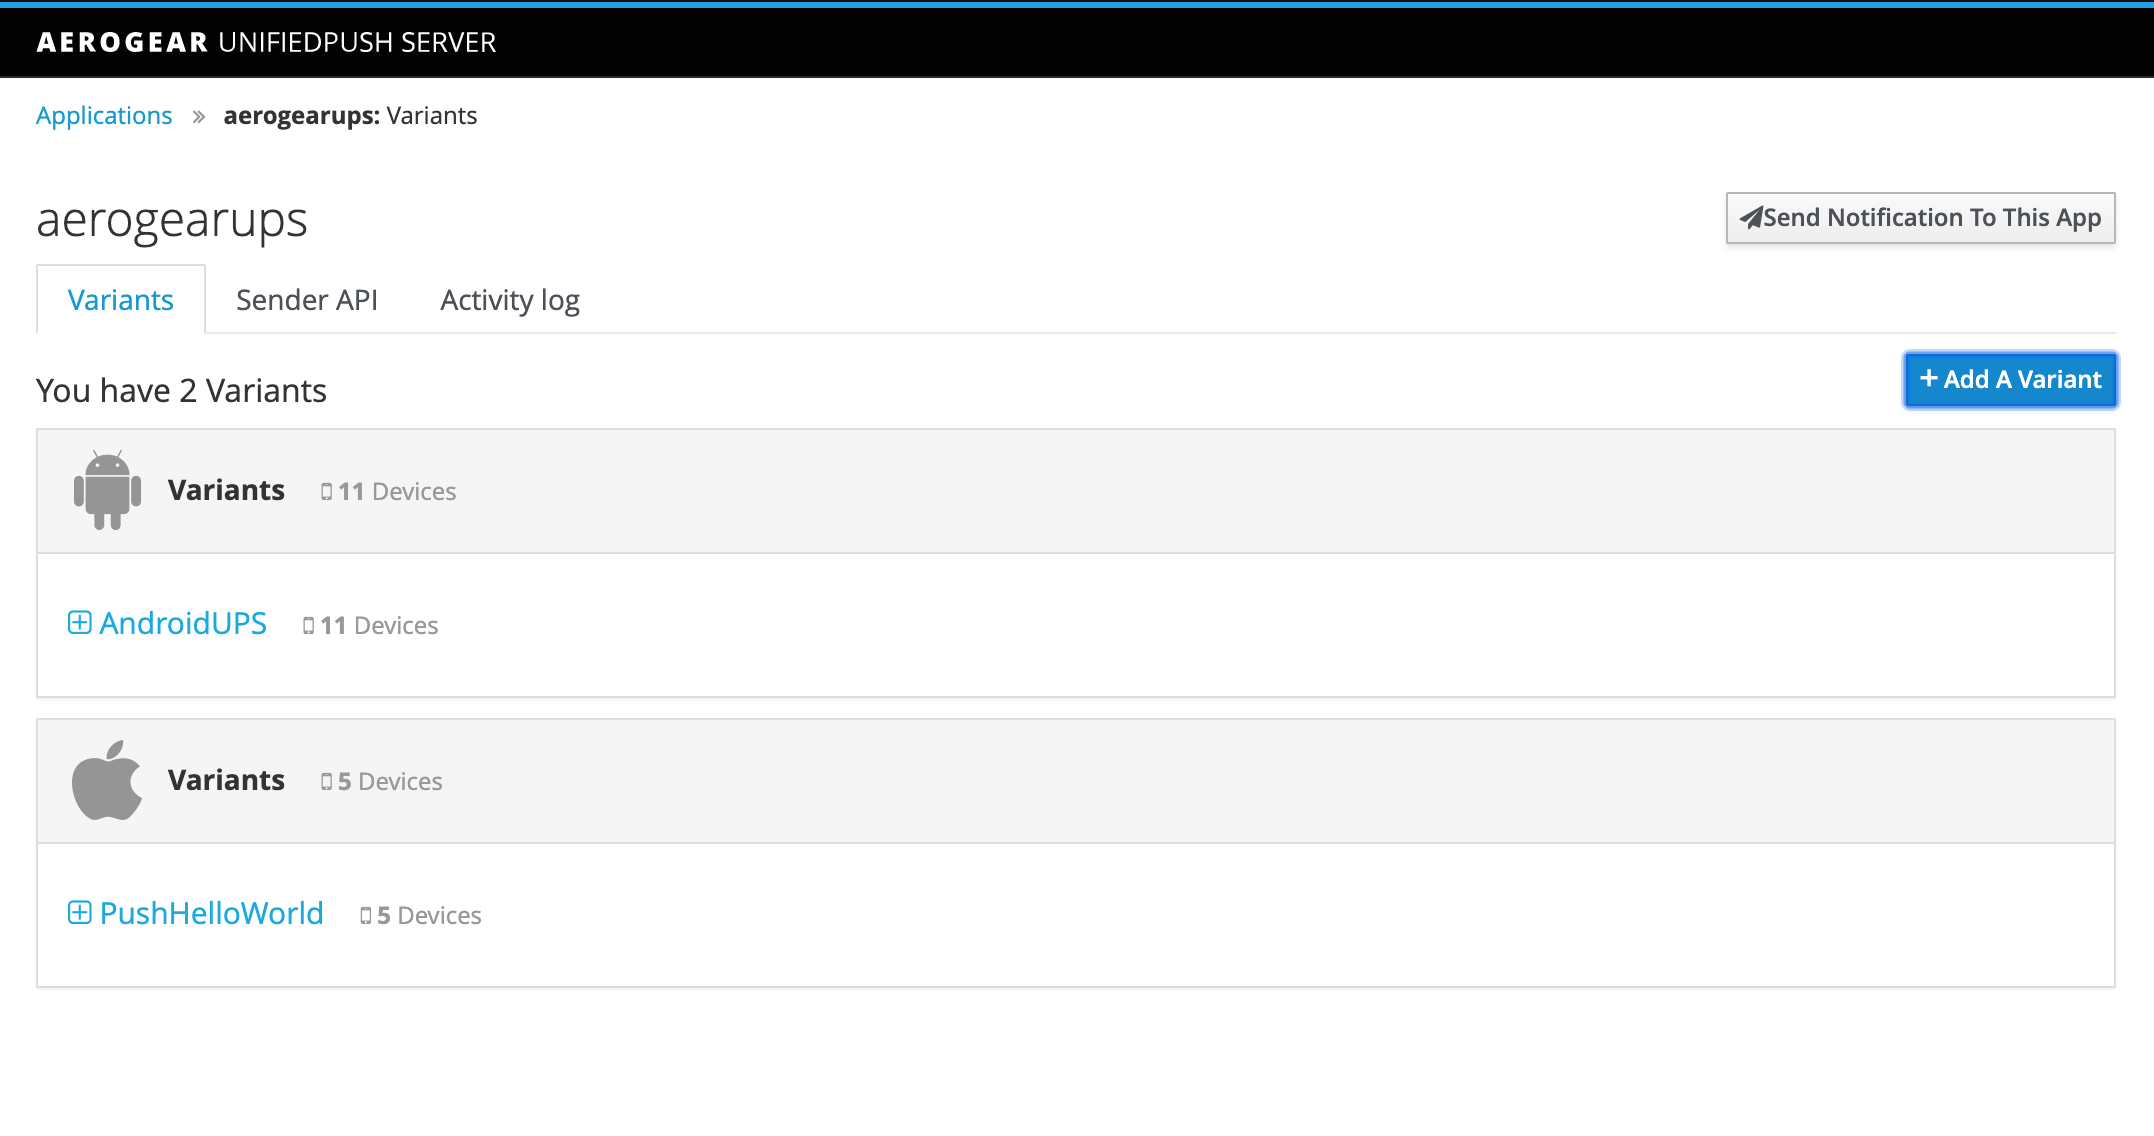
As soon as you have the keys, open (or create) an UPS application and click on the Add A Variant button

Add Variant

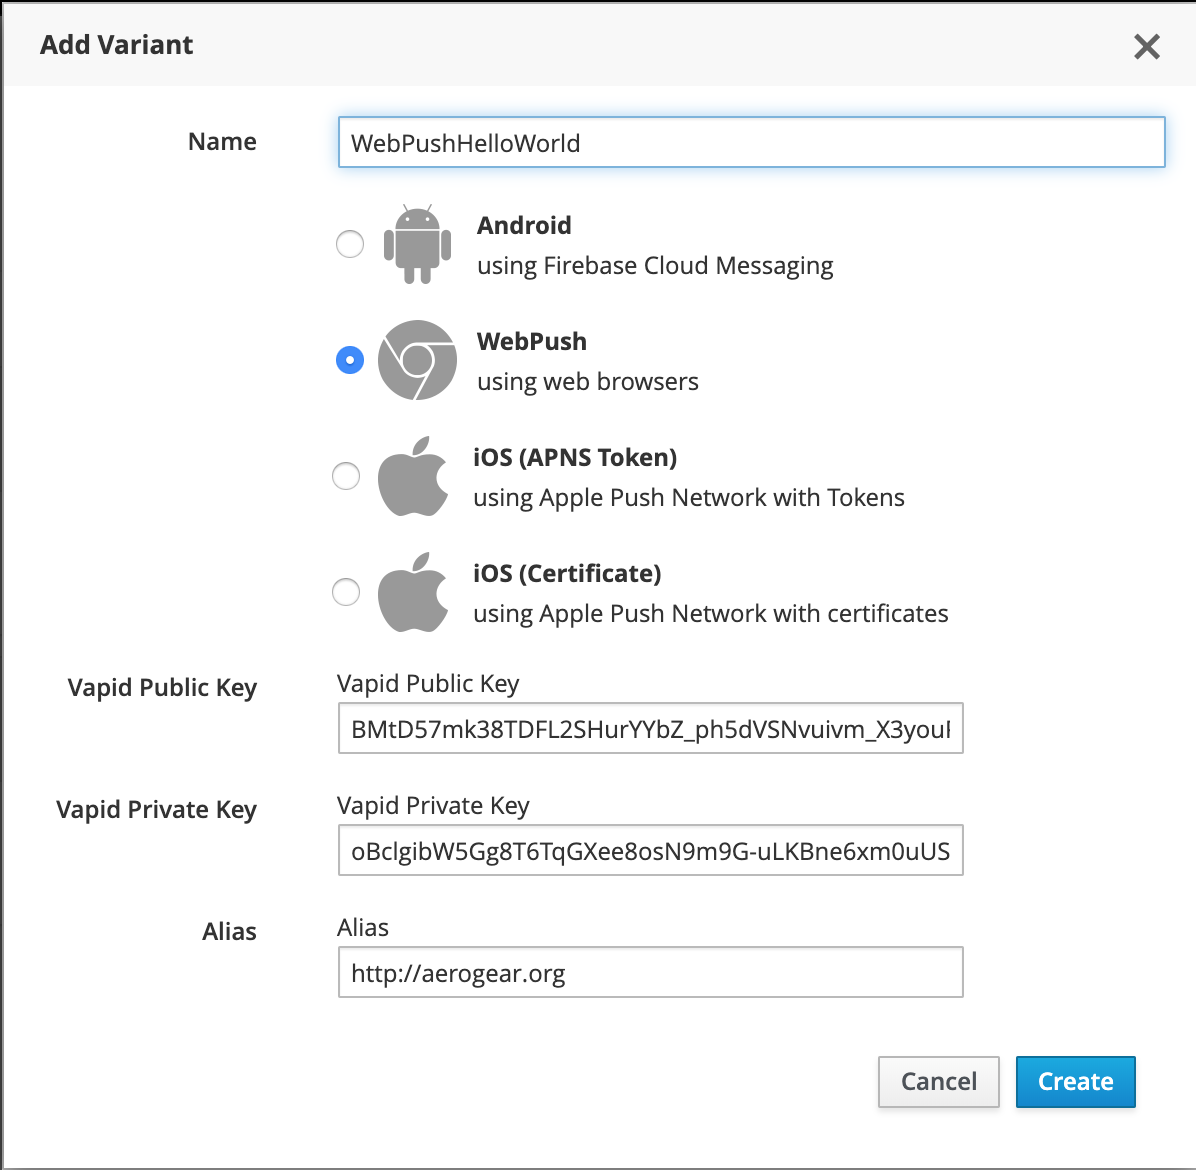
A popup will open. Select WebPush and fill in the data:

  • Vapid Public Key: your vapid public key
  • Vapid Private Key: your vapid private key
  • Alias: The application server contact information (this must be a mailto or an https url)

WebPush Variant

Click on create and your webpush variant is ready!

← iOS VariantAndroid Client →
  • Create WebPush Variants
Docs
Getting Started
Community
HelpAeroGear mailing listStack Overflow
Social
UnifiedPush Server
Follow @aerogears
Copyright © 2020 the AeroGear team