Configuring a iOS Client
Prerequisites: to be able to follow the instructions below, you must have cocoapods installed and working and you must have a variant already configured. For instructions on how to setup cocoapods see here
Create a new project
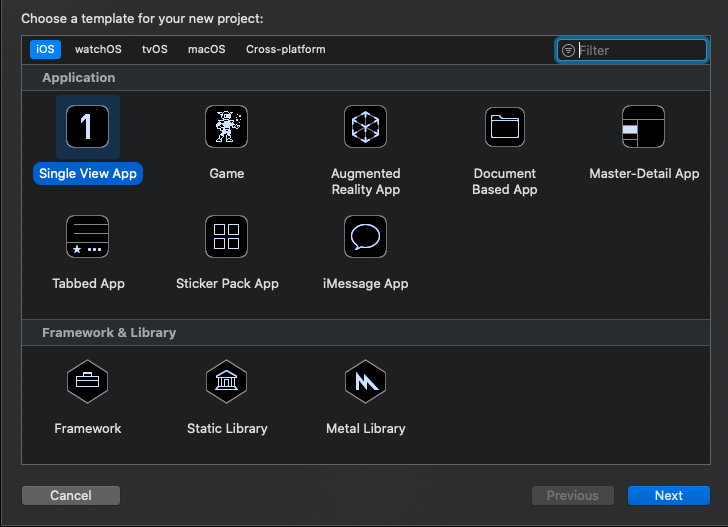
Open XCode and create a new project selecting iOS and Single View App:
Click Next. In the next page, insert the name of you application (in this example Demo App) and select your team.

warning
If you plan on supporting iOS 12 or older, change User Interface to Storyboard.
Click on Finish and save the app in a folder of your choice. Take note of that folder since we are going to open
a terminal there.
note
Take note of the folder you will save the project in, since you will need to go there with the terminal and run some command to install the required pods!
Add required capabilities
Click on the project to show the screen below:
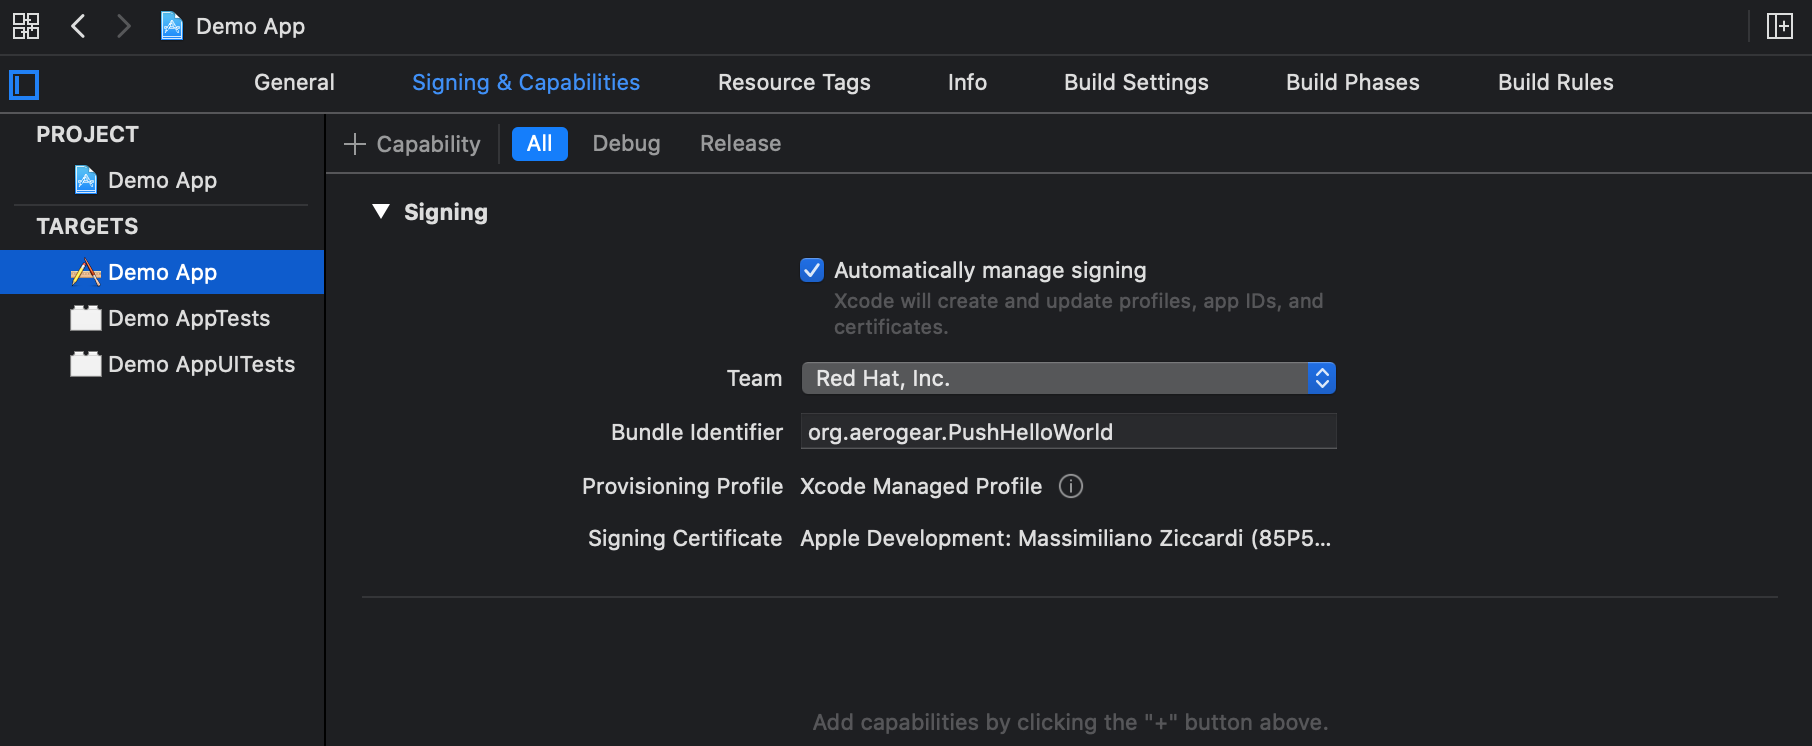
Select the Sign & Capabilities tab and click on the + button in the upper left corner to add the following capabilities:
- Background Modes
- Push Notifications
important
To be able to add the Push Notifications capability be sure you select the right team and that the team has an active membership.
After you have added both capabilities your window should look as below:
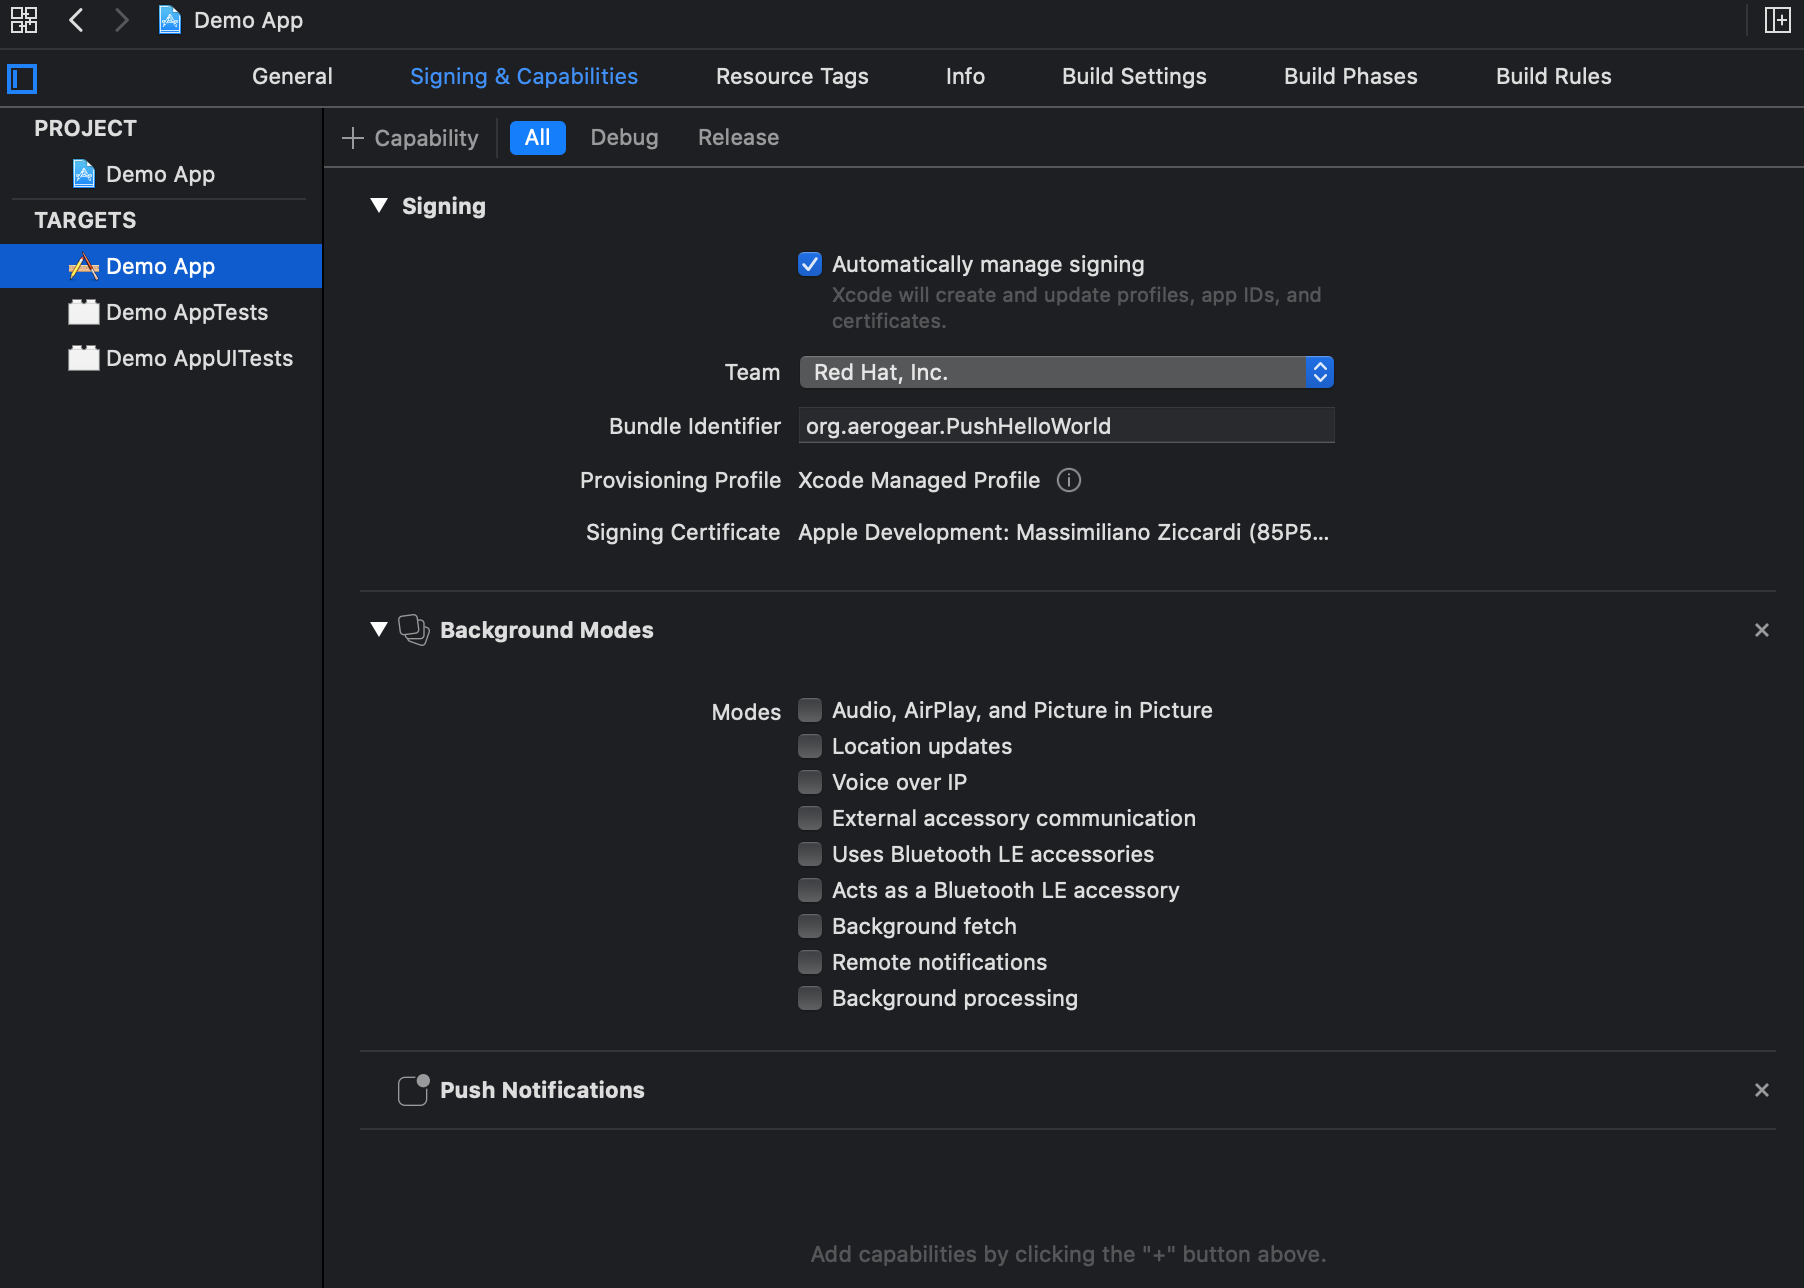
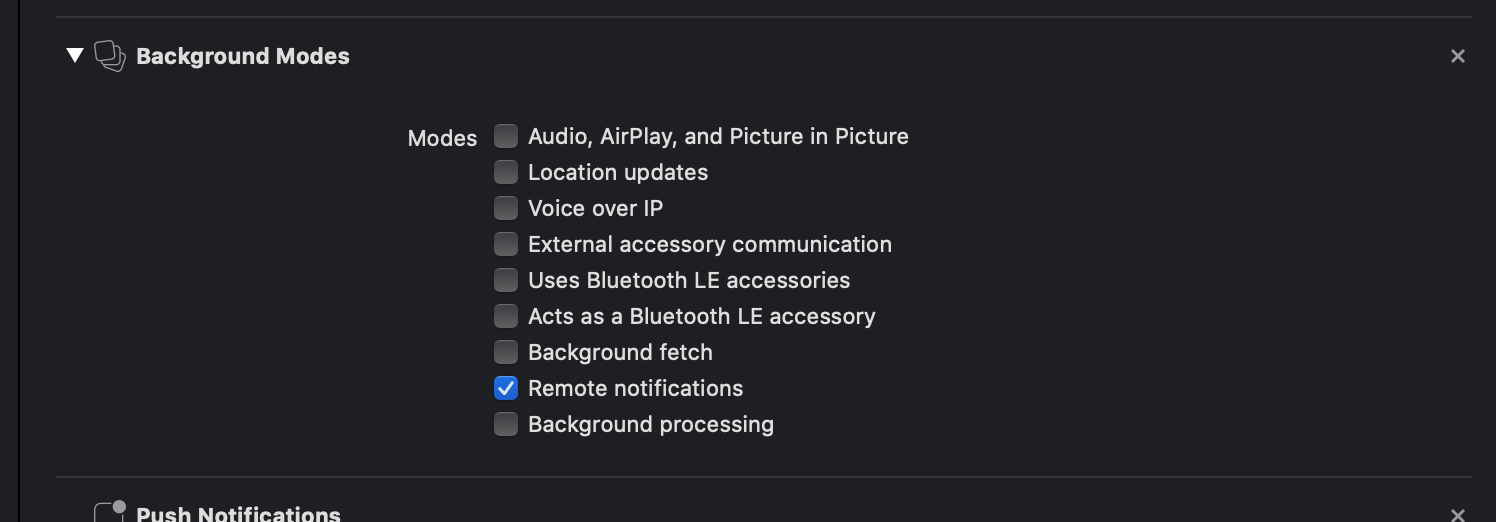
Now, be sure you click in Remote notifications under Background Modes to enable it:
warning
If you are using XCode 11, the generated project won't work with iOS 12 or older. If you need to support iOS 12, follow the Make the application backward compatible guide.
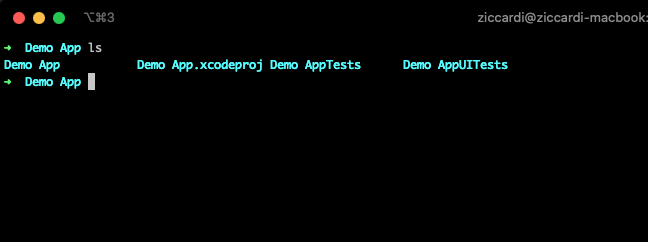
Add the pod dependencies
Close XCode and open a terminal, then change your current directory to the folder where you saved your project. You should see a content similar to the image below:
from there run
pod init
That will create a Podfile file in the current folder with the following content:
# Uncomment the next line to define a global platform for your project
# platform :ios, '9.0'

target 'Demo App' do
 # Comment the next line if you don't want to use dynamic frameworks
 use_frameworks!

 # Pods for Demo App

 target 'Demo AppTests' do
   inherit! :search_paths
   # Pods for testing
 end

 target 'Demo AppUITests' do
   # Pods for testing
 end
end
Uncomment the platform as suggested and add
pod 'AeroGearPush-Swift', '~> 3.1.0'
to the Podfile:
platform :ios, '9.0'

target 'Demo App' do
 # Comment the next line if you don't want to use dynamic frameworks
 use_frameworks!

 # Pods for Demo App
 pod 'AeroGearPush-Swift', '~> 3.1.0'

 target 'Demo AppTests' do
   inherit! :search_paths
   # Pods for testing
 end

 target 'Demo AppUITests' do
   # Pods for testing
 end
end
and run
pod install
you will end having a .xcworkspace file (in my case Demo App.xcworkspace).
Open it with XCode:
open Demo\ App.xcworkspace
warning
Remember to close XCode before running the open command
Asking permissions for receiving push messages
Before you can receive any push notification the first thing needed is to ask the user permissions to receive push notifications.
That can be done in the AppDelegate class with the code below:
class AppDelegate: UIResponder, UIApplicationDelegate {
    func application(_ application: UIApplication, didFinishLaunchingWithOptions launchOptions: [UIApplication.LaunchOptionsKey: Any]?) -> Bool {
        // bootstrap the registration process by asking the user to 'Accept' and then register with APNS thereafter
        UNUserNotificationCenter.current().requestAuthorization(options: [.alert, .badge, .sound], completionHandler: { (granted, error) in
        })
        UIApplication.shared.registerForRemoteNotifications()

        // Override point for customization after application launch.
        return true
    }
...
}
Registering your app
If the user grants permissions to receive push notification, the next step is to register the app to the Unified Push Server. To be able to perform such operation, you will need the following information:
- The URL of the Unified Push Server instance
- The ID of an iOS variant you previously created in UPS (to see how, look here)
- The secret of the iOS variant
To register the app the SDK offers the DeviceRegistration object, which, in turns, offers two different initializers:
DeviceRegistration(config: "<#NAME OF A PLIST FILE#>"): this is to be used when the parameters for the configuration are stored into aplistfileDeviceRegistration(config: "<#Unified Push Server URL#>"): this is to be used when the connection parameters are passed programmatically
tip
A good place to put the registration code could be
func application(_ application: UIApplication, didRegisterForRemoteNotificationsWithDeviceToken deviceToken: Data)
of the AppDelegate class
Registering using a plist file
// setup registration. 'pushconfig' is the name of the 'plist' file
let registration = DeviceRegistration(config: "pushconfig")

// attempt to register
registration.register(
        clientInfo: { (clientDevice: ClientDeviceInformation!) in
            // setup configuration
            clientDevice.deviceToken = deviceToken

            // apply the token, to identify THIS device
            let currentDevice = UIDevice()

            // set some 'useful' hardware information params
            clientDevice.operatingSystem = currentDevice.systemName
            clientDevice.osVersion = currentDevice.systemVersion
            clientDevice.deviceType = currentDevice.model
        },
        success: {
            print("UnifiedPush Server registration succeeded")
        },
        failure: { (error: Error!) in
            print("failed to register, error: \(error.localizedDescription)")
        }
)
The plist file must contain three string properties:
- serverURL: the url of the Unified Push Server
- variantID: the ID of the iOS variant associated with this application
- variantSecret: the secret of the iOS variant associated with this application
To make it work with the example above, name the plist file pushconfig.plist.
Registering programmatically
// setup registration
let registration = DeviceRegistration(serverURL: URL(string: "<#AeroGear UnifiedPush Server URL#>")!)

// attempt to register
registration.register(
        clientInfo: { (clientDevice: ClientDeviceInformation!) in
            // setup configuration
            clientDevice.deviceToken = deviceToken
            clientDevice.variantID = "<# Variant Id #>"
            clientDevice.variantSecret = "<# Variant Secret #>"

            // apply the token, to identify THIS device
            let currentDevice = UIDevice()

            // -- optional config --
            // set some 'useful' hardware information params
            clientDevice.operatingSystem = currentDevice.systemName
            clientDevice.osVersion = currentDevice.systemVersion
            clientDevice.deviceType = currentDevice.model
        },
        success: {
            print("UnifiedPush Server registration succeeded")
        },
        failure: { (error: Error!) in
            print("failed to register, error: \(error.localizedDescription)")
        }
)
To make the code work, remember to replace the placeholder with the real values.
Handle the push notifications
To handle the notification, in you AppDelegate.swift override the following method:
func application(_ application: UIApplication, didReceiveRemoteNotification userInfo: [AnyHashable: Any], fetchCompletionHandler: @escaping (UIBackgroundFetchResult) -> Void)
the userInfo parameters will contains all the information about the notifications. For further details, refer
to the apple website.
Make the application backward compatible
important
These steps are required only if you created the project with XCode 11 and you need to support iOS 12 or older
To make an application created with XCode 11 work with iOS 12 or older, few steps are necessary.
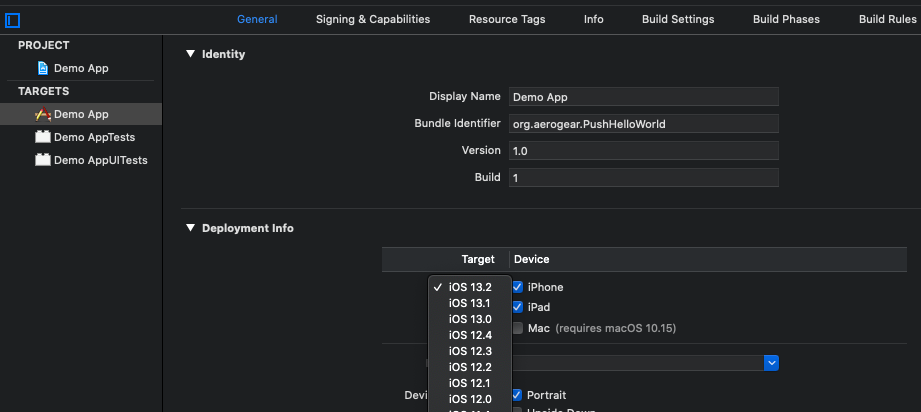
Change the deployment target
By default, when you create an application with XCode 11, it targets iOS 13.
To change the deployment target, open the project settings and go to the General tab as shown below:
Make the code backward compatible
The XCode 11 application template, by default uses lot of things that are not available in iOS 12: to fix those issues,
we will have to mark them with the @available keyword.
- Change the
ContentView.swiftfile so that its content is marked as available only on iOS13:
import SwiftUI

@available(iOS 13.0, *)
struct ContentView: View {
    var body: some View {
        Text("Hello, World!")
    }
}

@available(iOS 13.0, *)
struct ContentView_Previews: PreviewProvider {
    static var previews: some View {
        ContentView()
    }
}
- Do the same for the
SceneDelegate.swift
@available(iOS 13.0, *)
class SceneDelegate: UIResponder, UIWindowSceneDelegate {
...
- In the
AppDelegatemark with the@availablekeyword each method referring to theUIScene*classes
@available(iOS 13.0, *)
func application(_ application: UIApplication, configurationForConnecting connectingSceneSession: UISceneSession, options: UIScene.ConnectionOptions) -> UISceneConfiguration {
    // Called when a new scene session is being created.
    // Use this method to select a configuration to create the new scene with.
    return UISceneConfiguration(name: "Default Configuration", sessionRole: connectingSceneSession.role)
}

@available(iOS 13.0, *)
func application(_ application: UIApplication, didDiscardSceneSessions sceneSessions: Set<UISceneSession>) {
    // Called when the user discards a scene session.
    // If any sessions were discarded while the application was not running, this will be called shortly after application:didFinishLaunchingWithOptions.
    // Use this method to release any resources that were specific to the discarded scenes, as they will not return.
}
- Add a
UIWindowmember variable to theAppDelegate
@UIApplicationMain
class AppDelegate: UIResponder, UIApplicationDelegate {
    var window: UIWindow?
...
If you created the application selecting Storyboard as User Interface (see Create a new project), we are done: the application now works on iOS 12. Otherwise you will have to manually create a storyboard.
The Example application
An example application can be found here. To run it, follow the instruction in the README file.