Configuring an Android Client
Before you begin configuring an Android application to receive push messages, you should have the following installed, available, or configured as appropriate.
- Android Studio
- Google Firebase Account
- Android Emulator or device with Google Play Services
- Unified Push with an Android Variant Configured
Overview
Unified Push makes use of Google's Firebase Cloud Messaging service (FCM). Before you can use push messages with Android you will need to create a Firebase project. Android Studio can guide you through this process. Once you have your Firebase project set up, you can enable Firebase in your Android application. Like before, Android Studio has tools to facilitate this. These steps are covered in the section Firebase Configuration with Android Studio.
Once you have Firebase configured in your application, you can configure Unified Push. This involves adding the Unified Push libraries to your Android project, and adding a configuration file to your assets folder. With the configuration in place, you can begin using the Unified Push SDK. Configuration and usage are discussed beginning with the section Configure the Unified Push SDK
Firebase Configuration with Android Studio
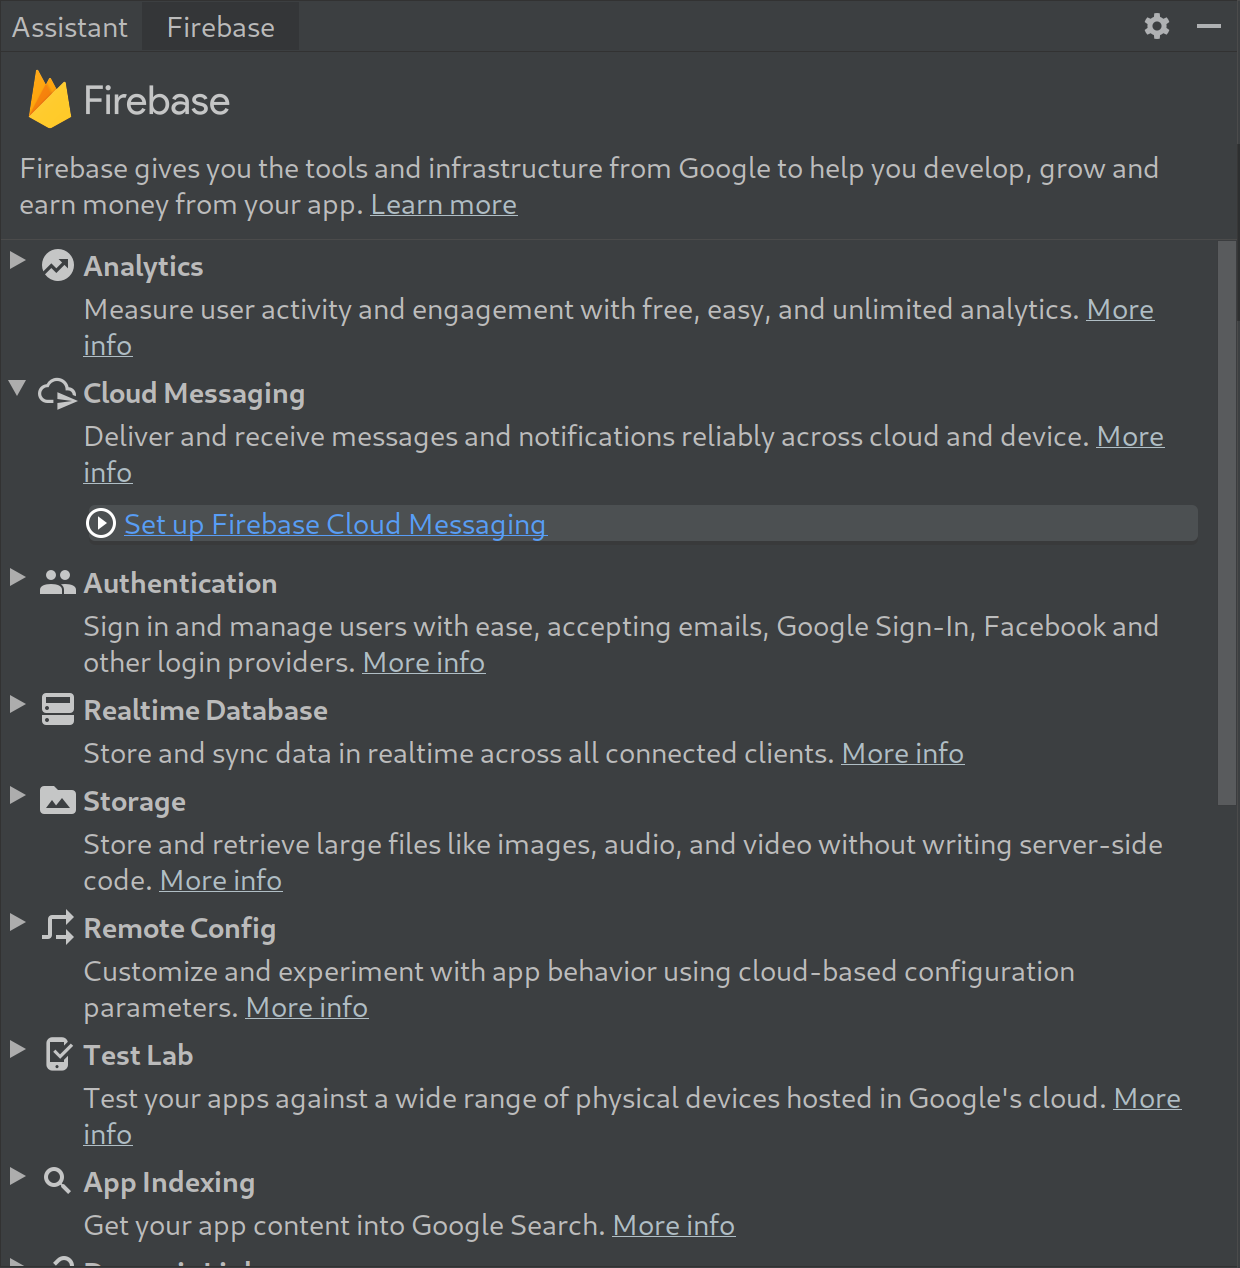
Android Studio can automate much of the Firebase integration process using the Firebase Assistant.
Access the assistant from the Tools > Firebase menu item.

In the assistant select Set up Firebase Cloud Messaging.
Then follow the wizards launched by the Connect to Firebase. The Firebase project name you choose to use should match the name of the Firebase project you used to configure your Android Variant.

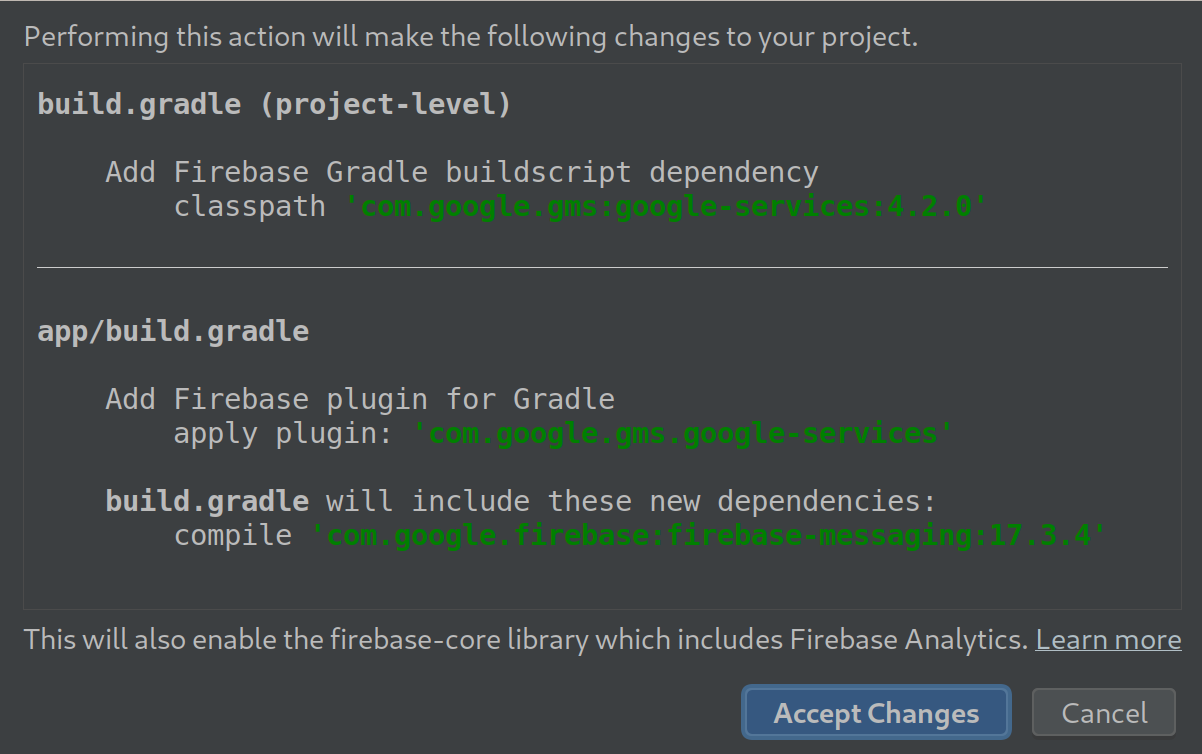
Finally, press the Add FCM to your app button and Android Studio will configure your build files so that your application can connect to Firebase.
The other steps in the Firebase Assistant are handled by Unified Push and its SDKs and may be ignored.
Configure the Unified Push SDK
The Unified Push SDK needs to be added to your project and configured.
To add the SDK to your project, add the following to you application's build.gradle dependencies:
implementation 'org.jboss.aerogear:aerogear-android-push:5.1.0'
Now create a file push-config.json in app/src/main/assets folder. Use the following template and copy the value from your variant in the Unified Push admin console.
{
  "pushServerURL": "pushServerURL (e.g http(s)//host:port/context)",
  "android": {
    "senderID": "senderID (e.g Google Project ID only for android)",
    "variantID": "variantID (e.g. 1234456-234320)",
    "variantSecret": "variantSecret (e.g. 1234456-234320)"
  }
}
Ensure that you put valid values on those params, otherwise you would be unable to register and receive notifications from the UnifiedPush server. Invalid configuration params are a very common source of problems, so please revisit them if you are experiencing problems.
Register With Unified Push
The entry point for registration is the RegistrarManager. This is a factory of different implementations of the PushRegistrar interface which contain the actual registration/unregistration methods.
By default, the method will return an implementation that supports registration with the UnifiedPush server. Having the flexibility of a factory method, allows us in the future to expand it to support other different message brokers under a common messaging interface.
Since the registration setup is an one-step process not bound to any Android 'Activity', let's encapsulate it in a subclass of an Android Application.
Create a new class, name it PushApplication and paste the following code:
package com.push.pushapplication;

import android.app.Application;

import org.jboss.aerogear.android.unifiedpush.PushRegistrar;
import org.jboss.aerogear.android.unifiedpush.RegistrarManager;
import org.jboss.aerogear.android.unifiedpush.fcm.AeroGearFCMPushJsonConfiguration;

public class PushApplication extends Application {

    private static final String PUSH_REGISTAR_NAME = "myPushRegistar";

    @Override
    public void onCreate() {
        super.onCreate();

        PushRegistrar pushRegistrar = RegistrarManager
                .config(PUSH_REGISTAR_NAME, AeroGearFCMPushJsonConfiguration.class)
                .loadConfigJson(getApplicationContext())
                .asRegistrar();

    }

}
The setup of the registration happens on the onCreate lifecycle method called when Android first initializes your application. It will create (and store) a PushRegistrar object based on push-config.json configuration declared earlier. This object together with a name (it can be anything you choose) are passed as params on the config factory method to create the PushRegistrar object.
We are now ready to call PushRegistrar:register method to register our device in the UnifiedPush server. The following code goes after you assign the pushRegistrar in your Application class.
    pushRegistrar.register(getApplicationContext(), new Callback<Void>() {
        @Override
        public void onSuccess(Void data) {
            Log.d(TAG, "Registration Succeeded");
            Toast.makeText(getApplicationContext(),
                    "Yay, Device registered", Toast.LENGTH_LONG).show();
        }

        @Override
        public void onFailure(Exception e) {
            Log.e(TAG, e.getMessage(), e);
            Toast.makeText(getApplicationContext(),
                    "Ops, something is wrong :(", Toast.LENGTH_LONG).show();
        }
    });
Don't forget to configure the Application class in AndroidManifest.xml
<application
    android:name=".PushApplication"
    ...
/>
That is all what is needed to register with the UnifiedPush server! Note that we didn't have to write any code to register the device with FCM. The library takes care off all the plumbing to register the device with FCM, obtain the registrationId and submit it to the UnifiedPush server.
note
If you don't see the Registration Succeeded popup, means that an error has occurred during the registration. Switch to the LogCat console in Android Studio to locate the exception and act accordingly.
Register Message Handlers
Classes which implement the MessageHandler interface may be registered with the Unified Push SDK to handle notifications send from the Unified Push Server. These classes may be executed on the main thread, or in background threads. You may also provide a default handler that is executed if a message is received while your application is not running.
Registering and Unregistering and The Activity life cycle
When your Activity comes into the foreground you will want to register any MessageHandlers that need to run in the main thread. Likewise when your Activity is in the background, you will want to have your main thread handlers disabled. You may do this by overriding the onPause and onResume methods.
At a minimum, your code should resemble :
//messageHandler is a field that points to a messageHandler

@Override
protected void onResume() {
    super.onResume();
    RegistrarManager.registerMainThreadHandler(messageHandler);
}

@Override
protected void onPause() {
    super.onPause();
    RegistrarManager.unregisterMainThreadHandler(messageHandler);
}
If you wish, you may also have background thread handlers.
RegistrarManager.unregisterBackgroundThreadHandler(messageHandler);
RegistrarManager.registerBackgroundThreadHandler(messageHandler);
Hello World Example
The AeroGear project provides an example UnifiedPush application in their unifiedpush-cookbook repository