Configuring a Webpush Client
Prerequisites: to be able to follow the instructions below, you must have Node.js installed and working and you must have a WebPush Variant already configured.
The guide below will be a simple step-by-step guide to integrate a sample React application with UnifiedPush Server.
Create a new project
This guide will walk you through the creation of a typescrypt React application. To create one, run:
$ npx create-react-app hello-world-webpush --template typescript
Add the required dependencies
$ cd hello-world-webpush
$ npm install --save @aerogear/push
Add the service worker
To be able to handle push notifications, a service worker is needed. In this guide we will provide a very simple implementation, for instructions about writing service workers please refer to the official documentation.
Inside the public folder, create a file named simple-sw.js with the following content:
self.addEventListener('install', function(event) {
  event.waitUntil(self.skipWaiting());
});

self.addEventListener('push', event => {
  const msg_chan = new MessageChannel();
  event.waitUntil(
    self.clients.matchAll().then(clientList => {
      if (clientList.length === 0) {
        return self.registration.showNotification(data);
      } else {
        clientList.forEach(client => {
          client.postMessage(event.data.text(), [msg_chan.port2]);
        });
      }
    })
  );
});
important
By default the react template unregisters the service worker automatically. That must be disabled.
Edit the src/index.tsx file and comment the serviceWorker.unregister(); call.
Creating the HelloWorld component
We are going to create a very simple component that will display a title ('Hello World') and the messages received by UPS. Create a file named HelloWorld.tsx in the src folder:
import React from 'react';
import { Component } from 'react';

interface HelloWorldState {
  message?: string,
  registered: boolean
}

export class HelloWorld extends Component<{}, HelloWorldState> {
  constructor() {
    super({});
    this.state = { registered: false };
  }

  private register = () => {
    // we will implement this later
  };

  private unregister = () => {
    // we will implement this later
  };

  private handleRegistrationStatus = () => {
    if (this.state.registered) {
      this.unregister();
    } else {
      this.register();
    }
  };

  public render = () =>{
    return (
      <>
        <h1>Hello World!!!</h1><br/>
          { this.state.message
              ? `UPS Says: ${this.state.message}`
              : 'No messages received yet' }<br/>
            <button onClick={this.handleRegistrationStatus}>{this.state.registered ? "Unregister" : "Register"}</button>
      </>
    )
  };
}
From now on, we will add here the code that integrates the UnifiedPush Server.
We now have the HelloWorld component, but we still don't reference it anywhere. Edit the src/App.tsx file by removing
all the scaffolding code and add the HelloWorld component to the page body. The result should be a content like the
following:
import React from 'react';
import './App.css';

import { HelloWorld } from './HelloWorld';

const App = () => {
  return (
    <div className="App">
      <HelloWorld/>
    </div>
  );
}

export default App;
Now we can run the app to see that everything works as expected:
$ npm run start
In the browser you should see:

Add UnifiedPush Server Integration
Registration/Unregistration
The object responsible for the registration/unregistration is the PushRegistration class, which exposes a register method.
The PushRegistration constructor takes a configuration object as parameters with the following structure:
const push_config = {
  url: 'your unified pushserver URL',
  webpush: {
    variantID: 'the ID of the WebPush variant you created in UPS',
    variantSecret: 'the secret of the variant identified by variantID',
    appServerKey: 'your VAPID public key (you can get it by opening the variant in UPS)'
  }
}
The register method takes one parameter also, with the following structure:
{
    serviceWorker: 'service worker name' // in this walkthrough, simple-sw.js
}
Add a configuration object to the HelloWorld class in the src/HelloWorld.tsx file:
private readonly push_config: PushInitConfig = {
  url: 'your unified pushserver URL',
  webpush: {
    variantID: 'the ID of the WebPush variant you created in UPS',
    variantSecret: 'the secret of the variant identified by variantID',
    appServerKey: 'your VAPID public key (you can get it by opening the variant in UPS)'
  }
};
Then fill the register and the unregister method:
/**
 * Register to the UPS
 */
private register = () => {
  new PushRegistration(this.push_config)
    .register({ serviceWorker: 'simple-sw.js' })
    .then(() => this.setState({ message: "Registration successful!", registered: true }))
    .catch(error => this.setState({ message: `Registration failed - ${error}` }))
};

/**
 * Unregister from UPS
 */
private unregister = () => {
  new PushRegistration(this.push_config)
    .unregister()
    .then(() => this.setState({ message: "Unregistered successfully", registered: false }))
    .catch(error => this.setState({ message: `Operation failed - ${error}` }))
};
important
Note the parameter passed to the register method: the value of the serviceWorker key is exactly the name of the service worker file we created into the public folder.
Receiving the notifications
To be able to receive notifications in your web application, you will need to register a callback that will receive the notification object as input:
  PushRegistration.onMessageReceived(notification => {
    const obj = JSON.parse(notification);
    this.setState({ message: obj.alert });
   });
Putting it all together
Edit the constructor of the HelloWorld.tsx class and add the following code:
  PushRegistration.onMessageReceived(notification => {
    const obj = JSON.parse(notification);
    this.setState({ message: obj.alert });
   });
The content of the src/HelloWorld.tsx file should be:
import React from 'react';
import { Component } from 'react';
import { PushInitConfig, PushRegistration } from "@aerogear/push";

interface HelloWorldState {
  message?: string,
  registered: boolean
}

export class HelloWorld extends Component<{}, HelloWorldState> {

  private readonly push_config: PushInitConfig = {
    url: 'your unified pushserver URL',
    webpush: {
      variantID: 'the ID of the WebPush variant you created in UPS',
      variantSecret: 'the secret of the variant identified by variantID',
      appServerKey: 'your VAPID public key (you can get it by opening the variant in UPS)'
    }
  };

  constructor() {
    super({});
    this.state = { registered: false };
    PushRegistration.onMessageReceived(notification => {
      const obj = JSON.parse(notification);
      this.setState({ message: obj.alert });
    });
  }

  /**
   * Register to the UPS
   */
  private register = () => {
    new PushRegistration(this.push_config)
        .register({ serviceWorker: 'simple-sw.js' })
        .then(() => this.setState({ message: "Registration successful!", registered: true }))
        .catch(error => this.setState({ message: `Registration failed - ${error}` }))
  };

  /**
   * Unregister from UPS
   */
  private unregister = () => {
    new PushRegistration(this.push_config)
        .unregister()
        .then(() => this.setState({ message: "Unregistered successfully", registered: false }))
        .catch(error => this.setState({ message: `Operation failed - ${error}` }))
  };

  private handleRegistrationStatus = () => {
    if (this.state.registered) {
      this.unregister();
    } else {
      this.register();
    }
  };

  public render = () => {
    return (
      <>
        <h1>Hello World!!!</h1><br/>
          { this.state.message
              ? `UPS Says: ${this.state.message}`
              : 'No messages received yet' }<br/>
              <button onClick={this.handleRegistrationStatus}>{this.state.registered ? "Unregister" : "Register"}</button>
      </>
    )
  };
}
If you didn't do already, you can now start the application with:
$ npm start
important
Remember to edit the push_config variable withe correct values!
Click on Register: if everything is ok, you should see a confirmation message.
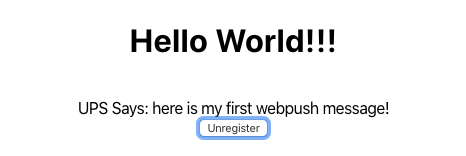
Now try to send messages to your variant from the UnifiedPush Server. You should see something like this:
For a complete example, look at the WebPush HelloWorld example.